How I develop RAW images with Darktable
Darktable is one of the most famous and active open source projects. Along with GIMP, Krita (raster image editors), and Inkscape (vector image editor) it makes Linux perfectly suitable for working with photography and graphical design.
This workflow showcase is based on Darktable version 4.6.1 installed via flatpak (FlatHub) on Fedora 40. The version of GIMP used is 2.10.36, once again installed via flatpak.
The sample snapshot is taken with Nikon Z 5 camera and Nikon Z 24-50mm f/4-6.3 lens at 50mm, f/11 aperture, 1/250 of a second shutter speed, and ISO 100 sensitivity.

Steps 1 to 4
The very first step of every development process is to correct as much distortion your gear has brought into the image. In Darktable there is a Lens Correction module for this. It has presets for many popular lenses and can be easily automated. In this particular case, however, the lens I took this sample picture with is not in the database. Fortunately, this particular lens brings very little distortion, especially on its longer 50mm end.
The second step will be dealing with the image noise using Darktable Denoise (profiled) module. It will base its settings on ISO sensitivity set in camera.
Local contrast module makes images to look visually sharper without any unwanted artifacts. Default settings are sane and work well all the time. I found no reasons not to use it for every photograph.
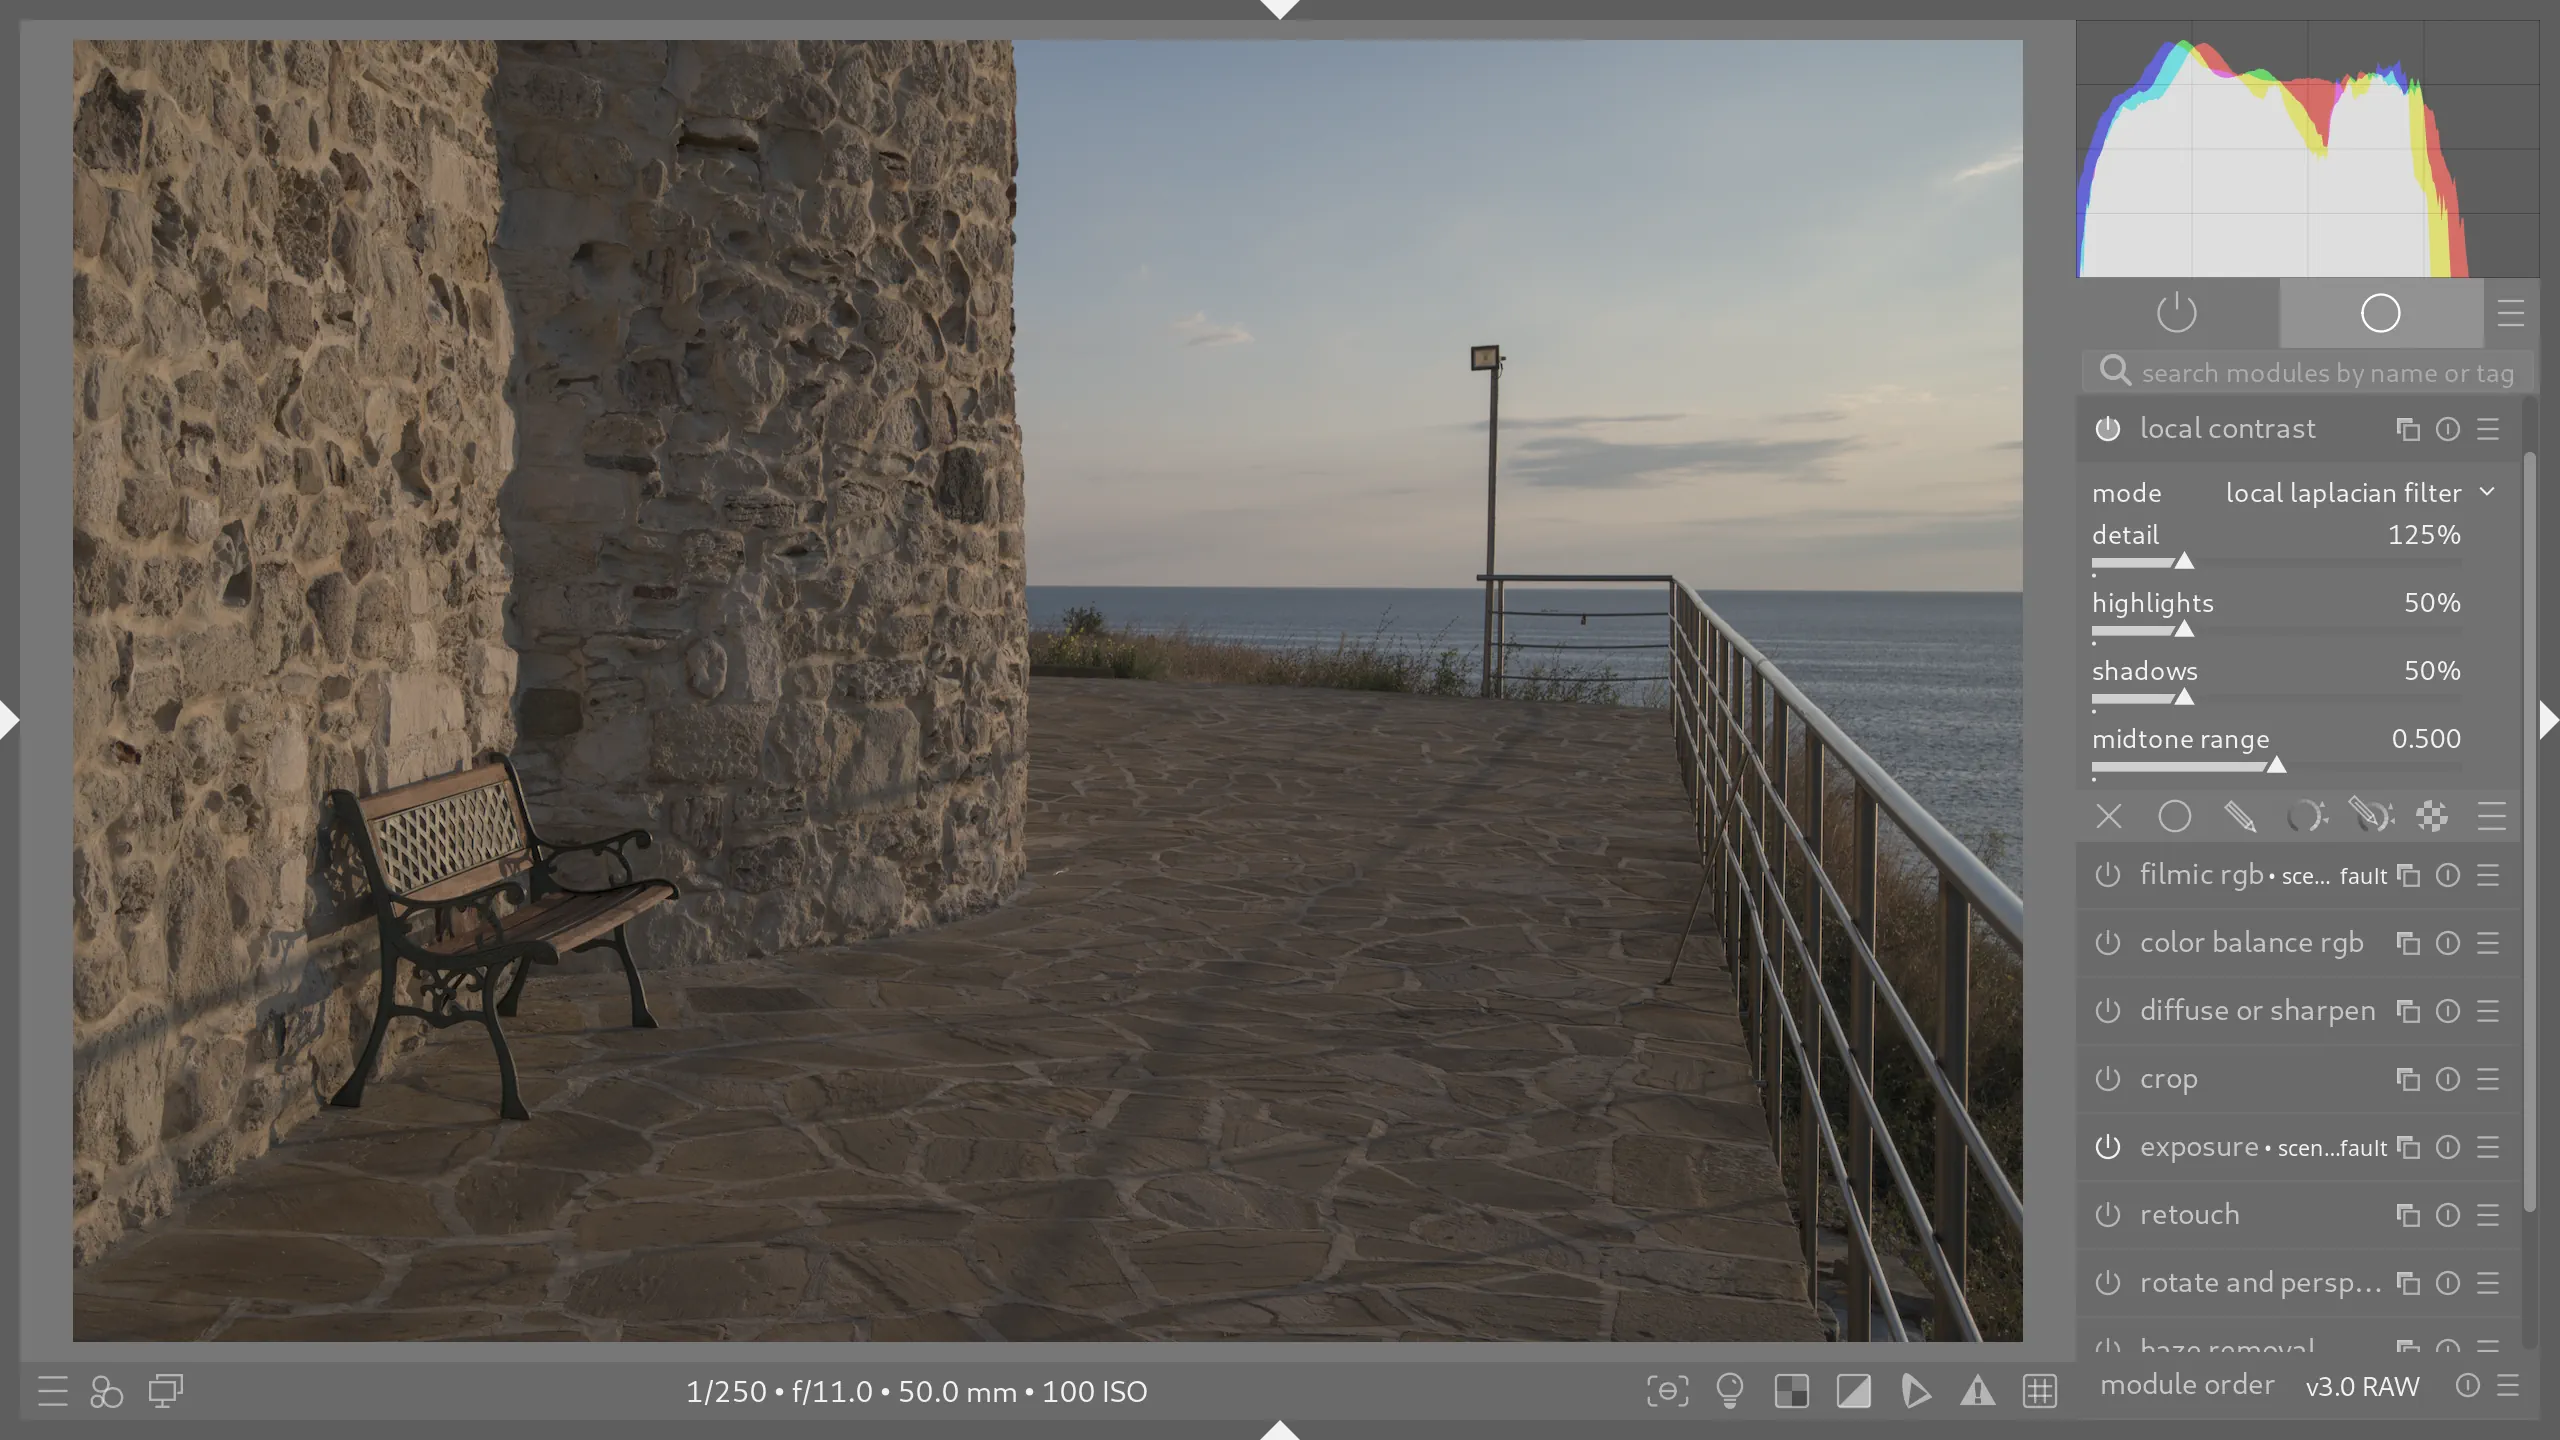
The last of the first four easy steps is Velvia. This one is more to the taste, but I personally, like the warmer tones and more saturated colors it brings. As the first three steps, this one can be applied automatically to every picture.

5. Rotate and perspective
Now it’s time for the more interactive edits. I prefer to start with cutting out pieces of the out-of-camera capture that do not contribute to its story, idea or composition.
In its Rotate and perspective module Darktable provides a very powerful tool that pretty much automates correction of perspective distortions and making the horizon straight. All I need to do is to press a button to analyze image structure and then press another button to make all necessary corrections. The parts of the image that won’t fit into a rectangle afterwards will be cut off automatically. Works like a charm 8 times out of 10. For the times when it doesn’t there are manual tools and option to set the grid lines to smaller steps for better visual control.

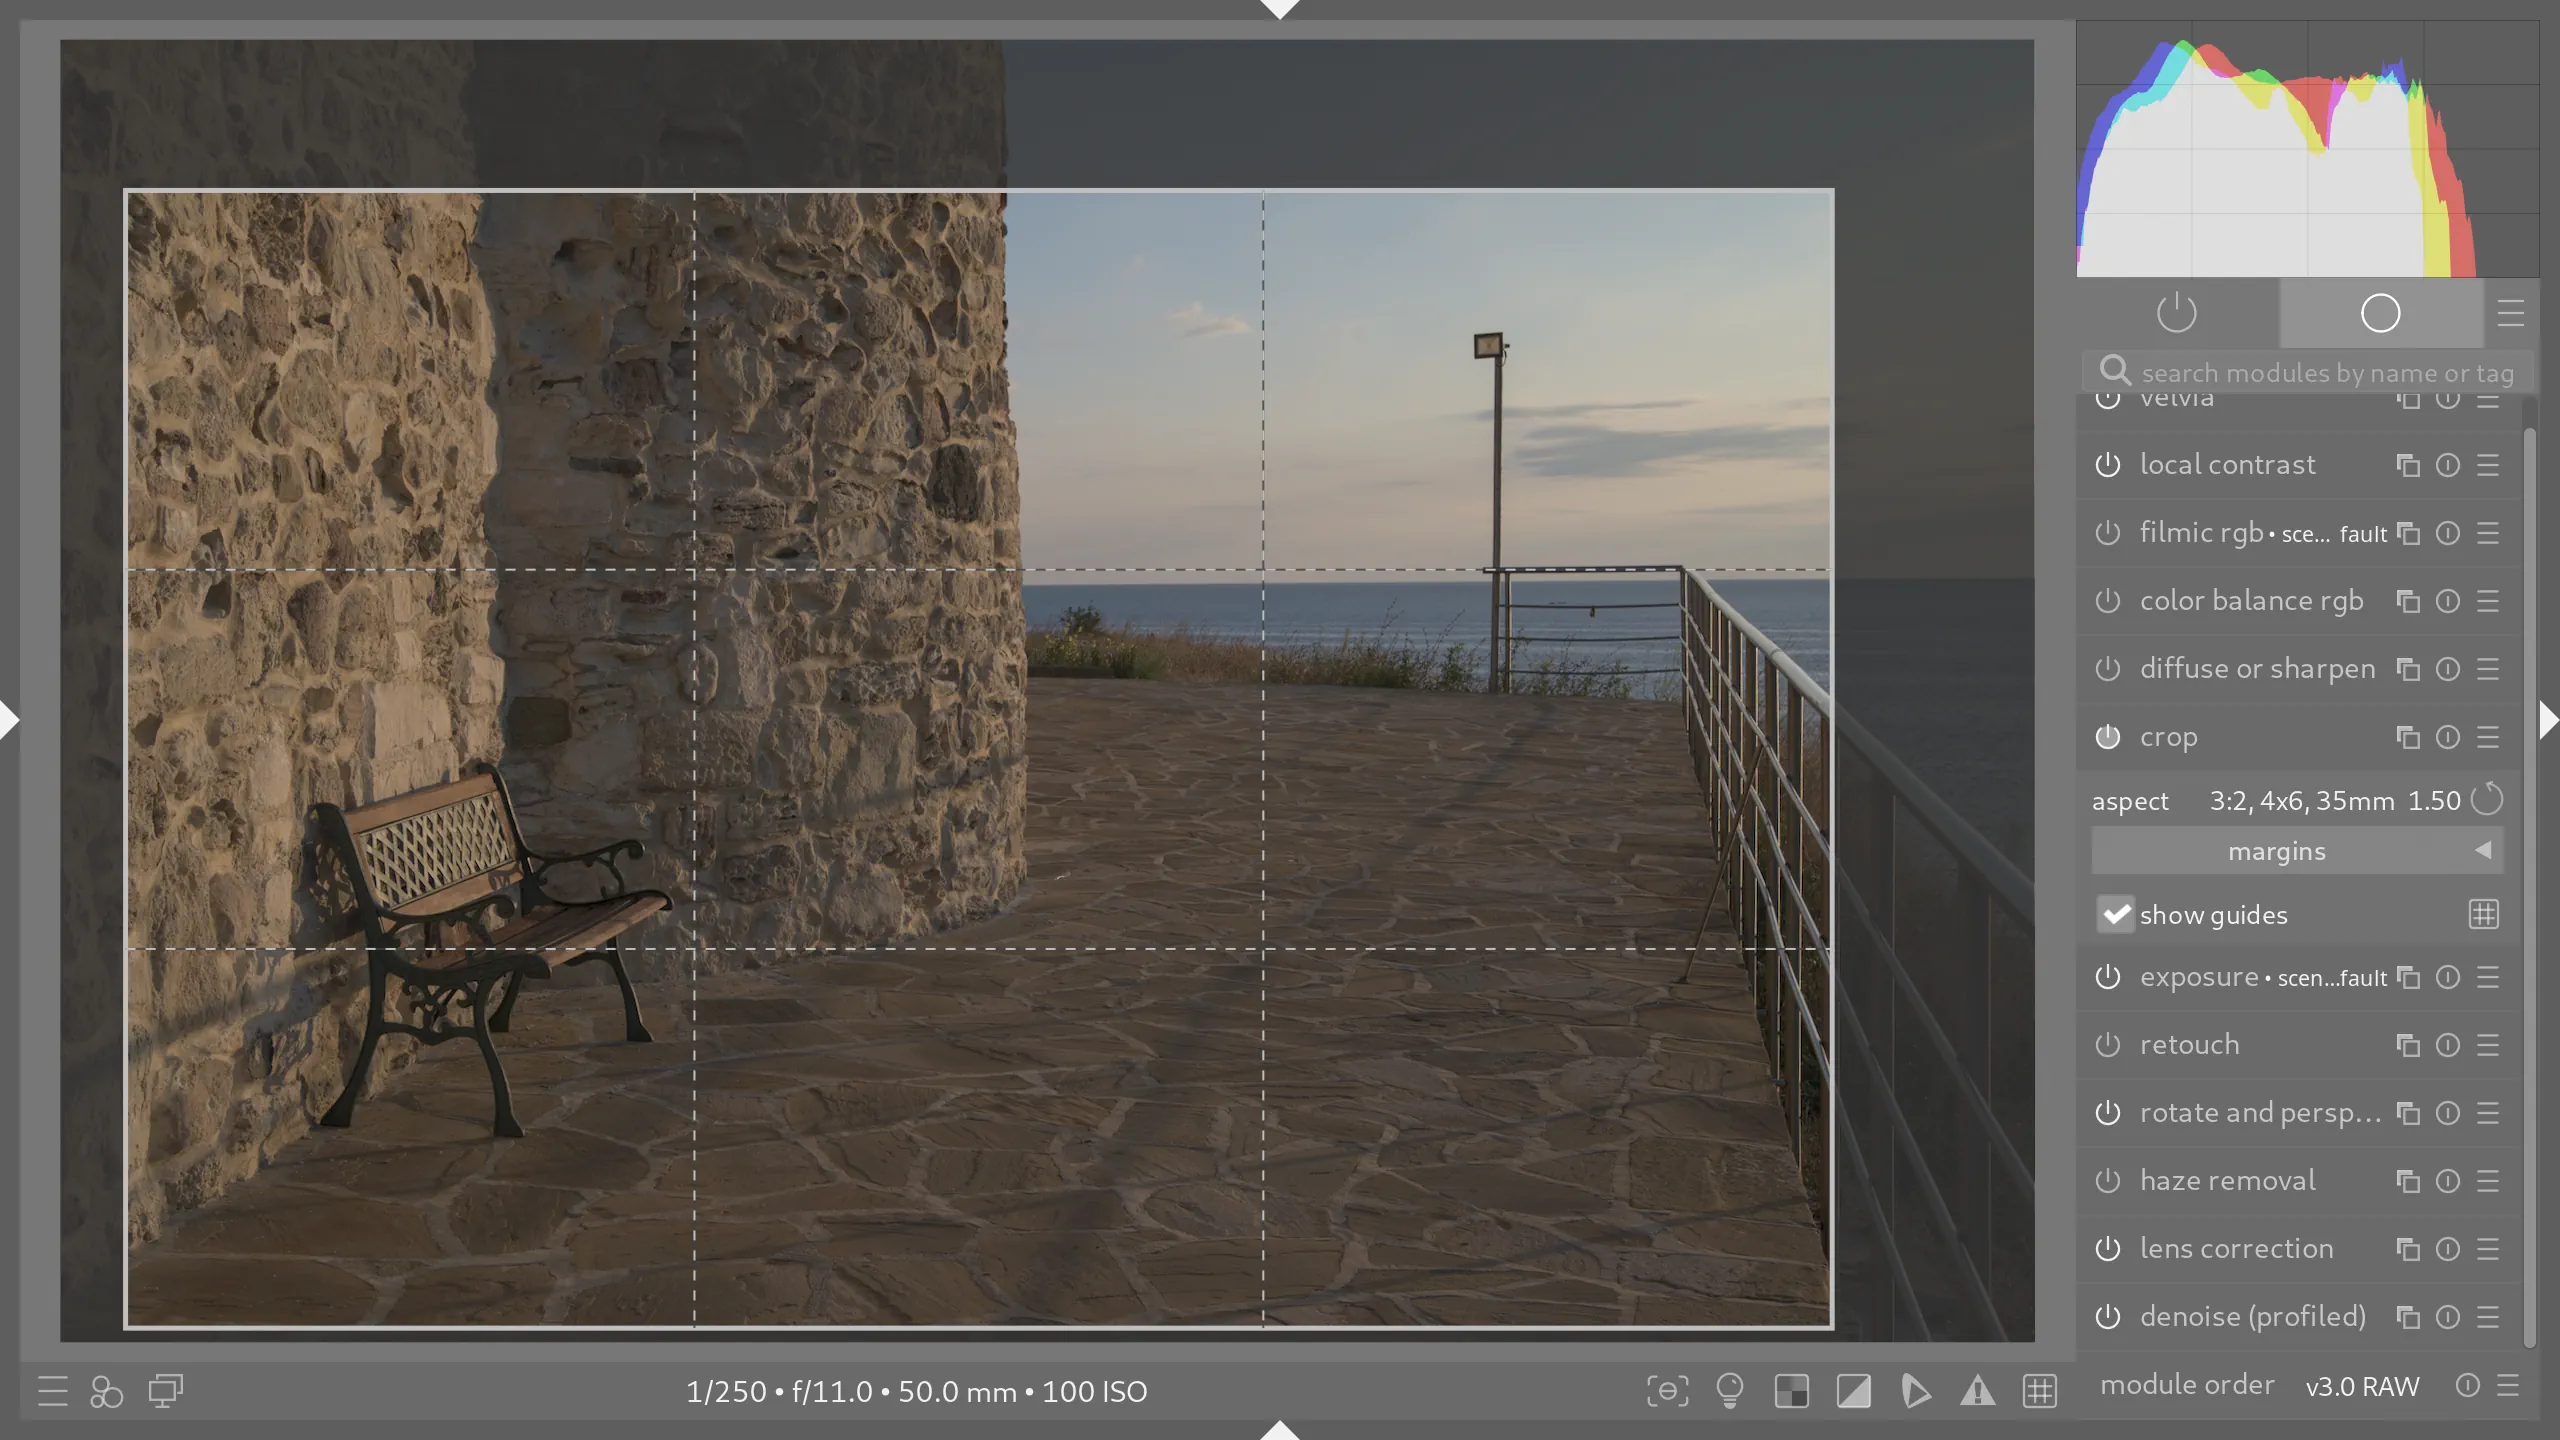
6. Crop
Once horizon is straight and vertical lines are properly perpendicular to it, more cutting to do. Darktable's Crop module is pretty straight-forward and works exactly the same way such tools are working in other raster image editors.
Personally, I prefer to keep my photo at the original 3:2 aspect ratio, or, if it would benefit the composition, cut to other conventional aspect ratios: 1:1, 5:4, 4:3, 16:10, 16:9.
7. Diffuse or sharpen
Now proceeding to work on image contrast and colors. For the former I like to use Lens deblur: hard preset of the Diffuse or sharpen module. It works the best in 80% of all cases.

8. Color balance RGB
For all landscapes and cityscapes with very few exceptions, the best color preset is Basic colorfulness: Vibrant colors of the Color balance RGB module.
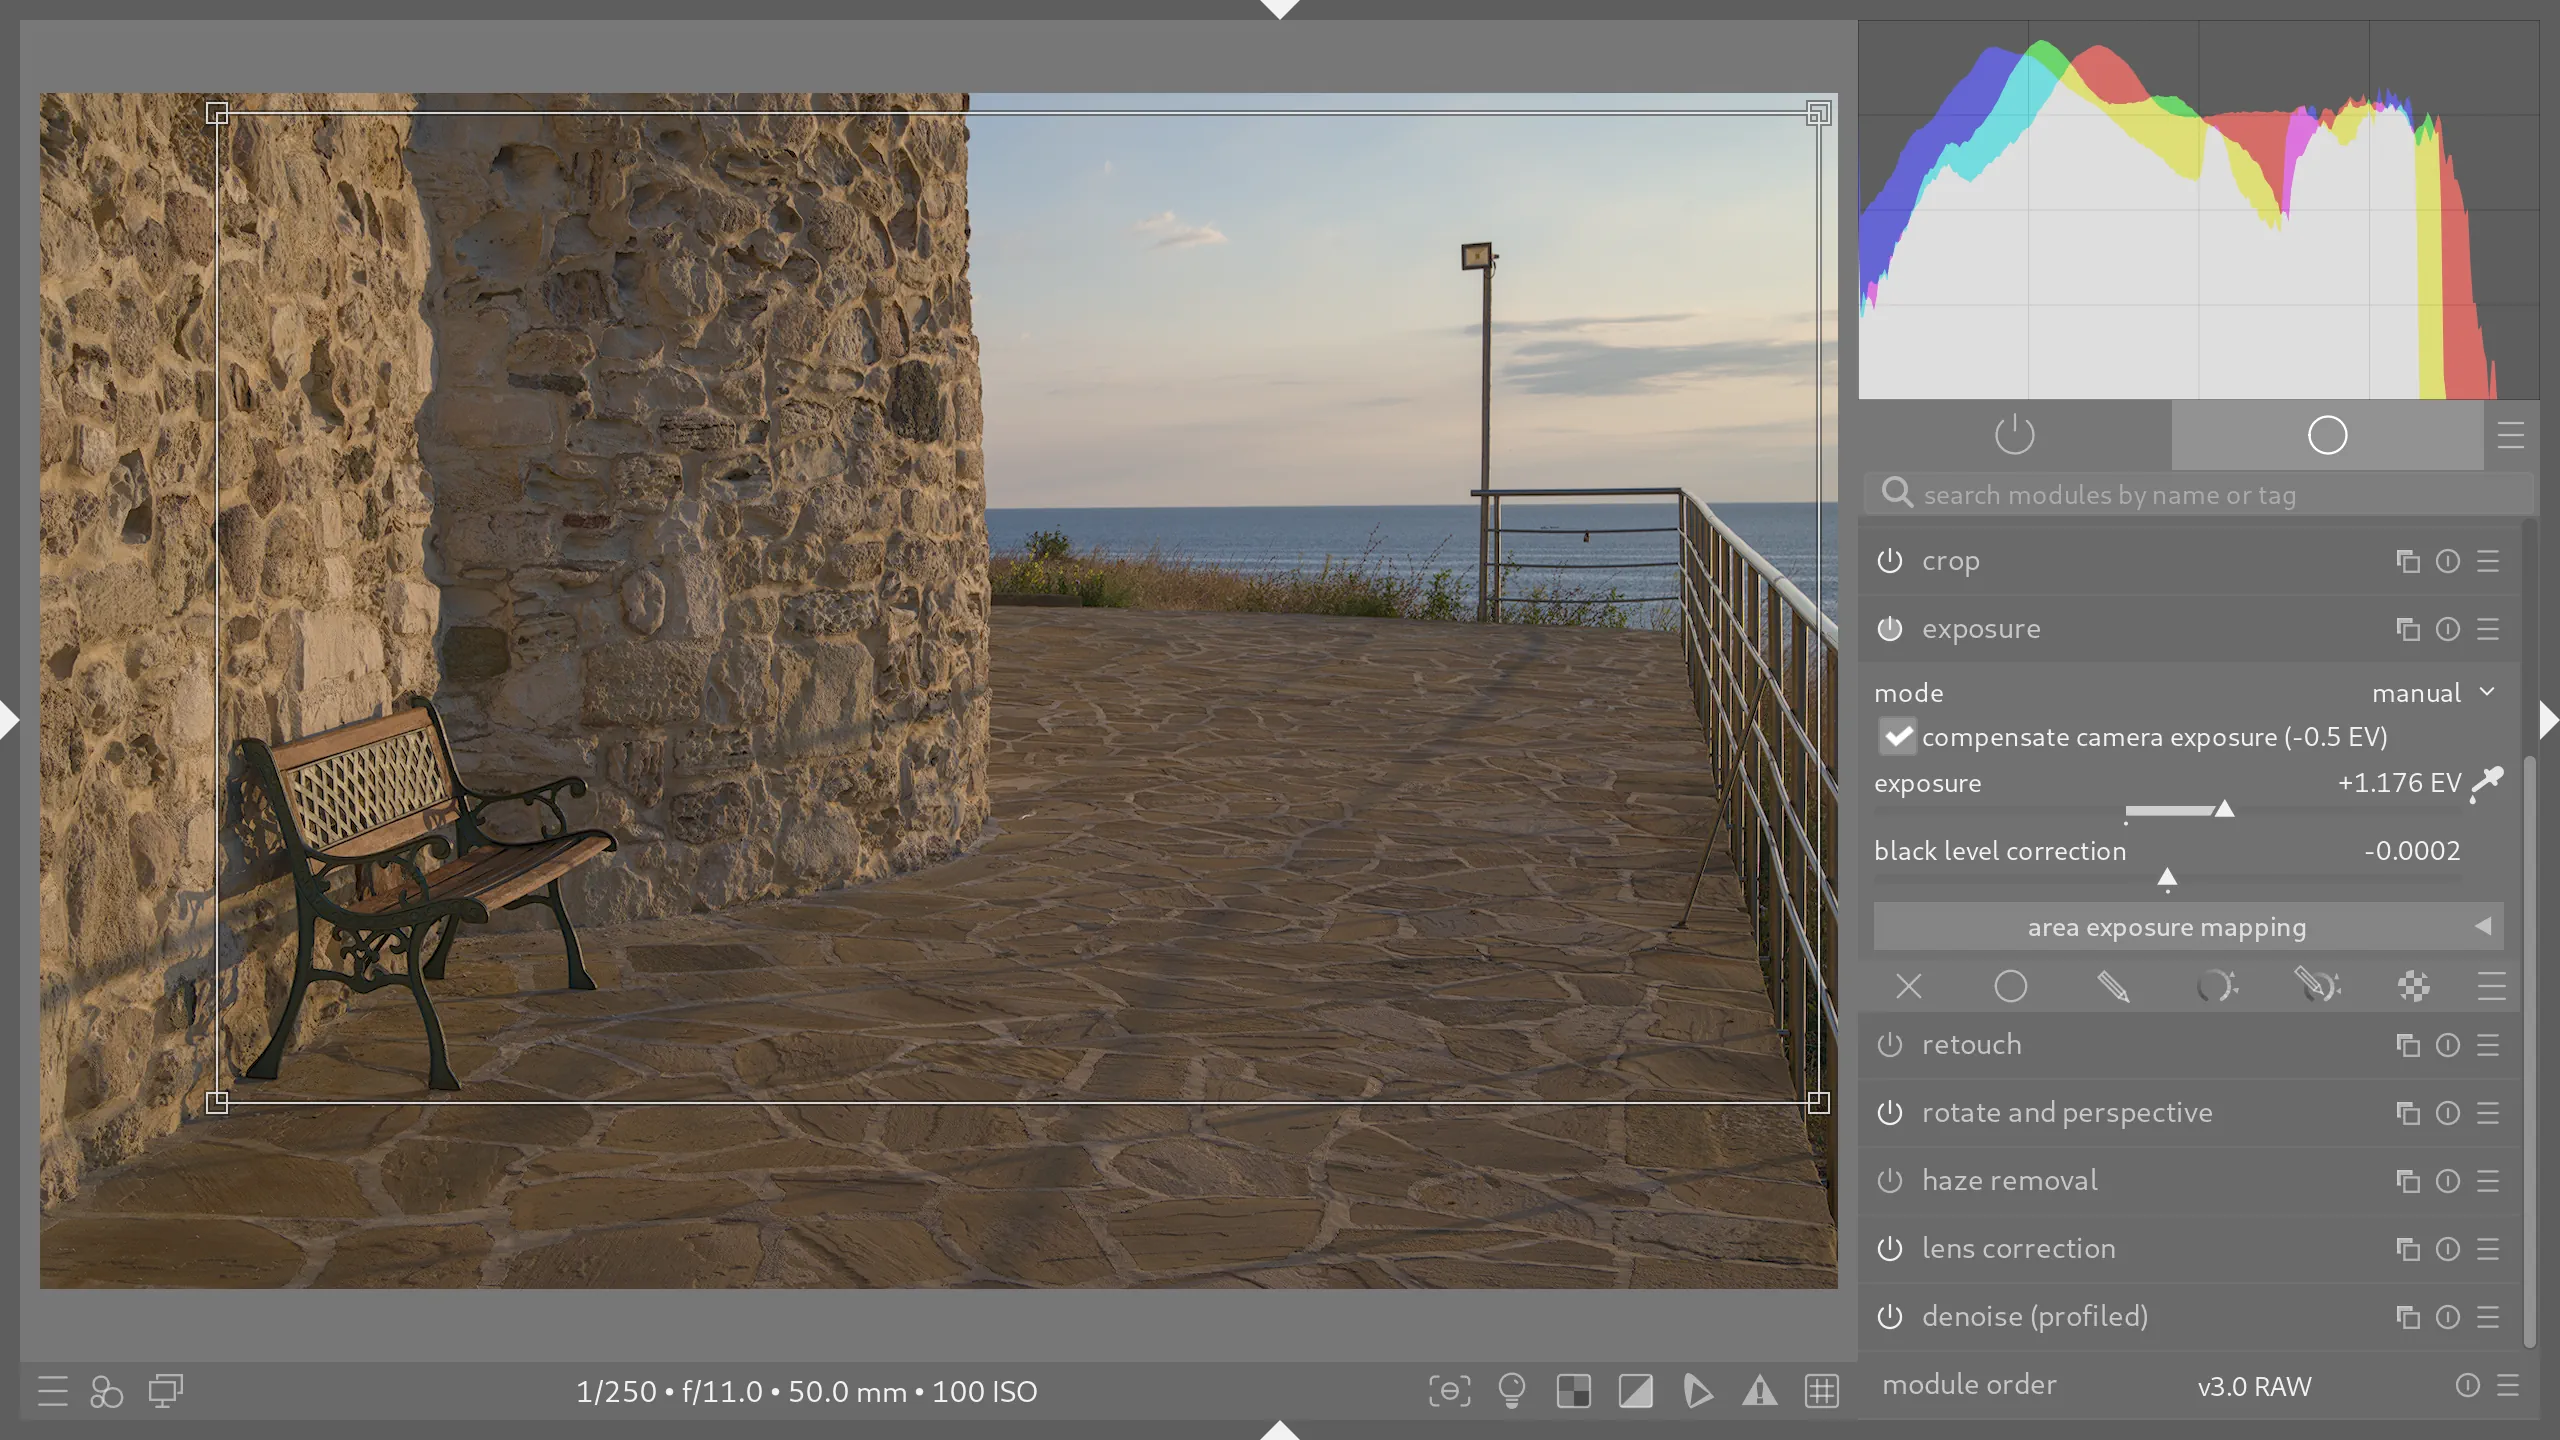
9. Exposure
Now when the colors and contrast mostly right (or more like “to the taste”) it is time to finally fine tune the exposure. Default exposure correction setting is +0.7 ev. With it as we can see no major area of the picture is overexposed. I took care of it when setting up my camera exposure dial before taking this picture, but the scene feels a little dull, because I was maybe too careful not to overexpose the sky.
With the area selection tool I can select the area of the picture which should be used to calculate automatic exposure correction. To brighten up the walls of the church while keeping the sky well exposed I will select the most of the latter and the most notable subject of the wall side of the picture. Exposure module will do the rest.
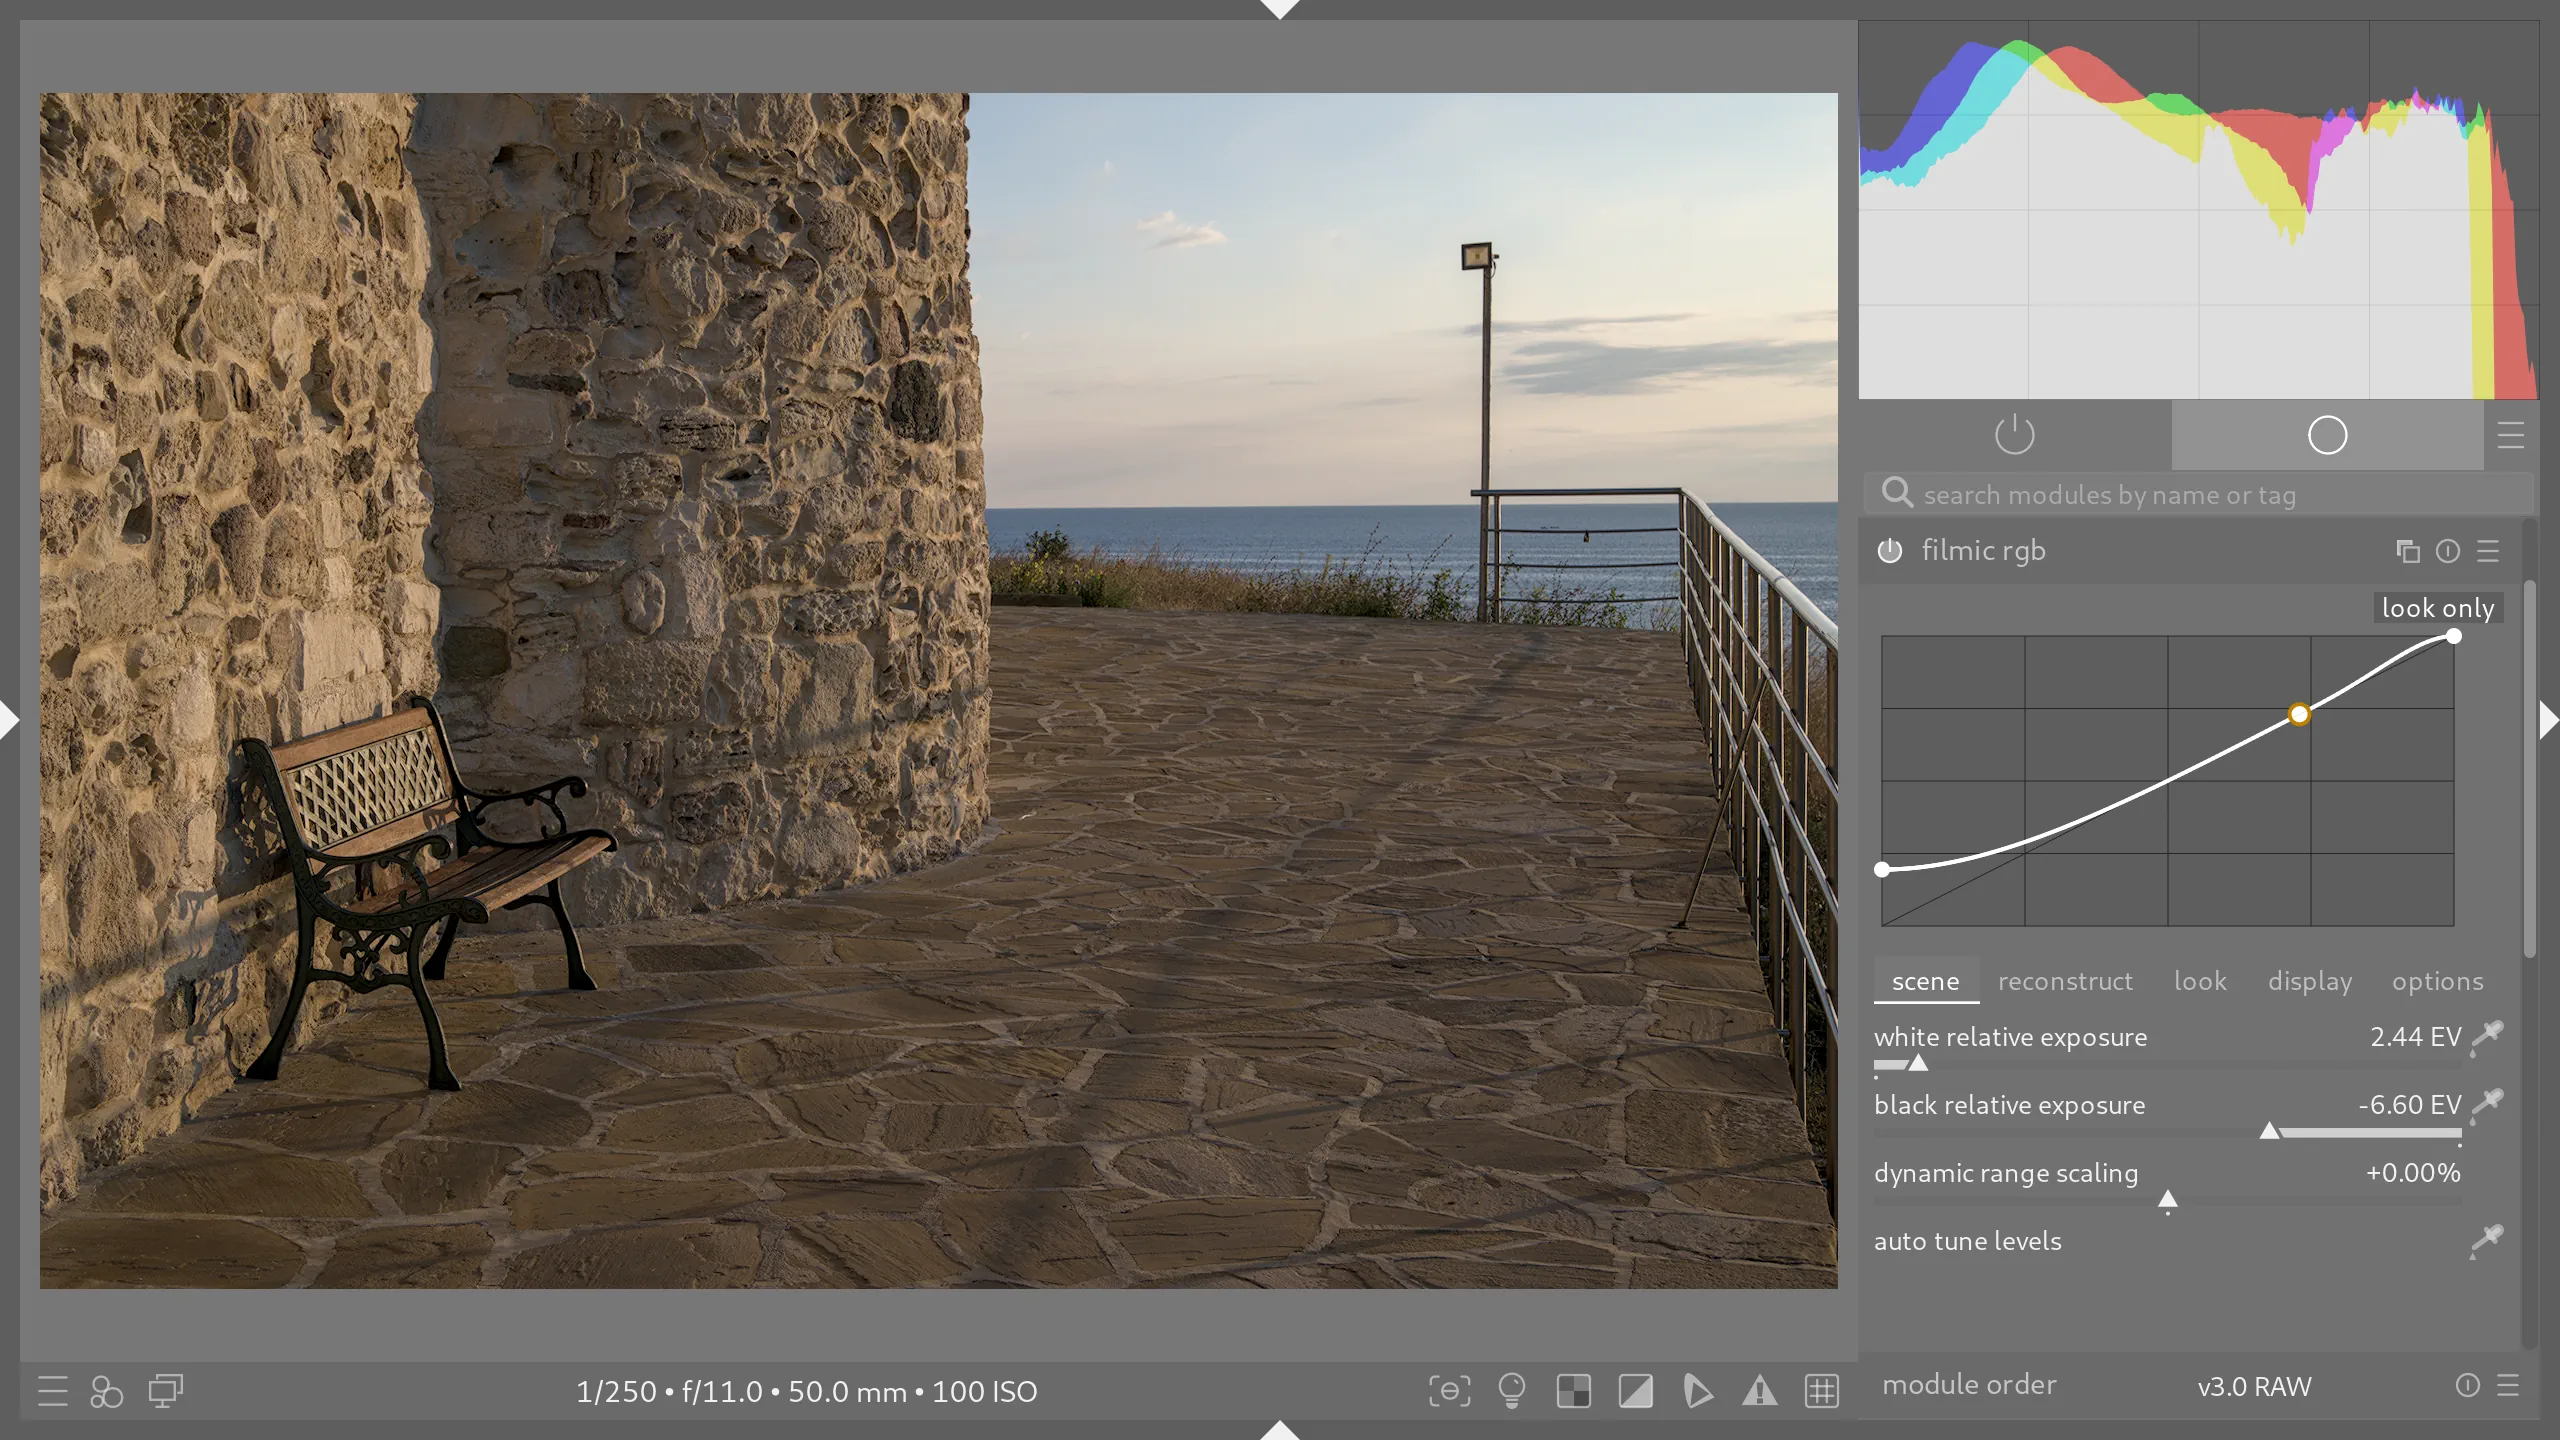
10. Filmic RGB
Now the picture looks mostly right, but its histogram tells otherwise. It doesn’t touch the right edge while the picture does contain things (clouds, in this case) that should be almost white.
There are few ways to solve this issue, but Darktable developers recommend using Filmic RGB module. I let it Auto tune levels and then dial down white and black relative exposure settings to my taste and naturally looking histogram.
11. Retouch
The final step of the Darktable part of the workflow is Retouch. This picture will benefit from a little bit of janitorial work. Somebody left a plastic spoon and a cigarette butt on the otherwise pristine stone floor. The fishing boats quite far in the sea are awkwardly positioned and do not add any value, only visual noise. Things like this can be safely removed.
12. Exporting images from Darktable

Export format of the image is always a compromise between convenience, file size, and image quality. Uncompressed TIFF images maintain uncompromising quality and can be viewed everywhere, but take a lot of disk space. AVIF file format has one of the best image quality to file size ratio but still not that widely adopted. I only use my photos on the web, this is why, after a series of tests, I settled for the plain old JPEG at 97% compression quality and 4:4:4 chroma subsampling. With this settings I can’t notice any compression artifacts and color shifts in my photos, yet 24 megapixels photographs fit into 16 megabytes, mas o menos, which is manageable for long-term storage.
13. Preparing images for the web
JPEG files freshly exported from Darktable are perfectly fine for long-term storage and browsing offline on a good monitor. For the web, however, they are a little bit too big. Even heavily cropped sample photo from an entry-level camera ended out to be 5173 by 3446 pixels. 99.99% computer screens on today’s market can’t display all these pixels at once. Most of them, at least the ones people actually use to browse photographs on the internet, are either Full HD, 4k, or anything in between. And it looks like it will remain this way for the next ten years, at least. Surely, the number of displays with 1920 by 1080 pixels resolution will slowly decline and the number of 4k and similar pixel count displays will slowly rise. However, users of both HD and HiDPI screens still won’t be willing to hide their user interface elements just to provide more screen real estate for my photos. This is why I believe fitting photos into 2560 by 1440 pixels (so called 2k resolution) is the best image size for the modern web, with enough headroom for foreseeable future.
At the sixth step of this workflow I cropped the sample photo to the 3:2 aspect ratio. This way, down-scaled to fit standard 2k resolution, it will become 2160 by 1440 pixels. I use “NoHalo” interpolation algorithm in GIMP. It is considered the best choice for down-scaling images in GIMP version 2.10.
After down-scaling the photo looks a little bit on a softer side. The best way to fix it is to utilize GIMP plugin G’MIC-Qt. Its built-in filter Sharpen [Inverse Diffusion] is great for it, but default value of 2 iterations is probably too much, I prefer to dial it down to only one iteration.
![G'MIC-Qt interface with “Sharpen [Inverse Diffusion]” filter selected.](https://vk7.eu/i/develop-raw-darktable-10.webp)
The best format for the web in the year 2024 is still webp, AVIF's adoption is still lacking, and the difference between the two is not that drastic, let’s be honest.
Important export/conversion settings are:
- Image quality: 80+ — webp doesn’t like gradients (like in the sky). If those are not very prominent in the photo, this setting can be dialed down all the way to 82 or even 80 without introducing to many compression artifacts. But it is always a good idea to check the resulting file and re-export with higher image quality if needed.
- Source type: Photo — the choice is pretty obvious here.
For my sample snapshot “Image quality: 82” worked marvelously and produced 2k image of 707.6 kilobytes, which is perfectly fine for a fairly big photo on the web, and a huge difference comparing to the 12.1 megabytes of the original Darktable export, or 25.9 megabytes of compressed RAW data straight out of the camera.
